As explained in the Data Explorer article, you can generate a map from a project data, selecting all the data, or at the contrary, choosing to include only some of the data.
Maps are not projects. They are static. Nobody can add or remove items. From a single project, you can generate an unlimited number of maps, choosing to show some of the items only (for instance items placed only by a specific user, or specific items type etc...).
Projects are only shared between their contributors. On the contrary, maps are designed to be publically available.
Visitors don't need to have a PoiGpsClub Account to see maps. They just need the URL of the map.
With PoiGpsClub, you can generate public or private maps. Private maps are password protected for visitors. Of course, contributors have access to any map generated from their projects.
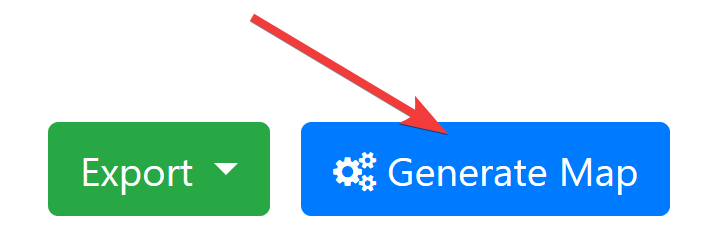
To generate a map from the Data Explorer, click on the "Generate Map" button:

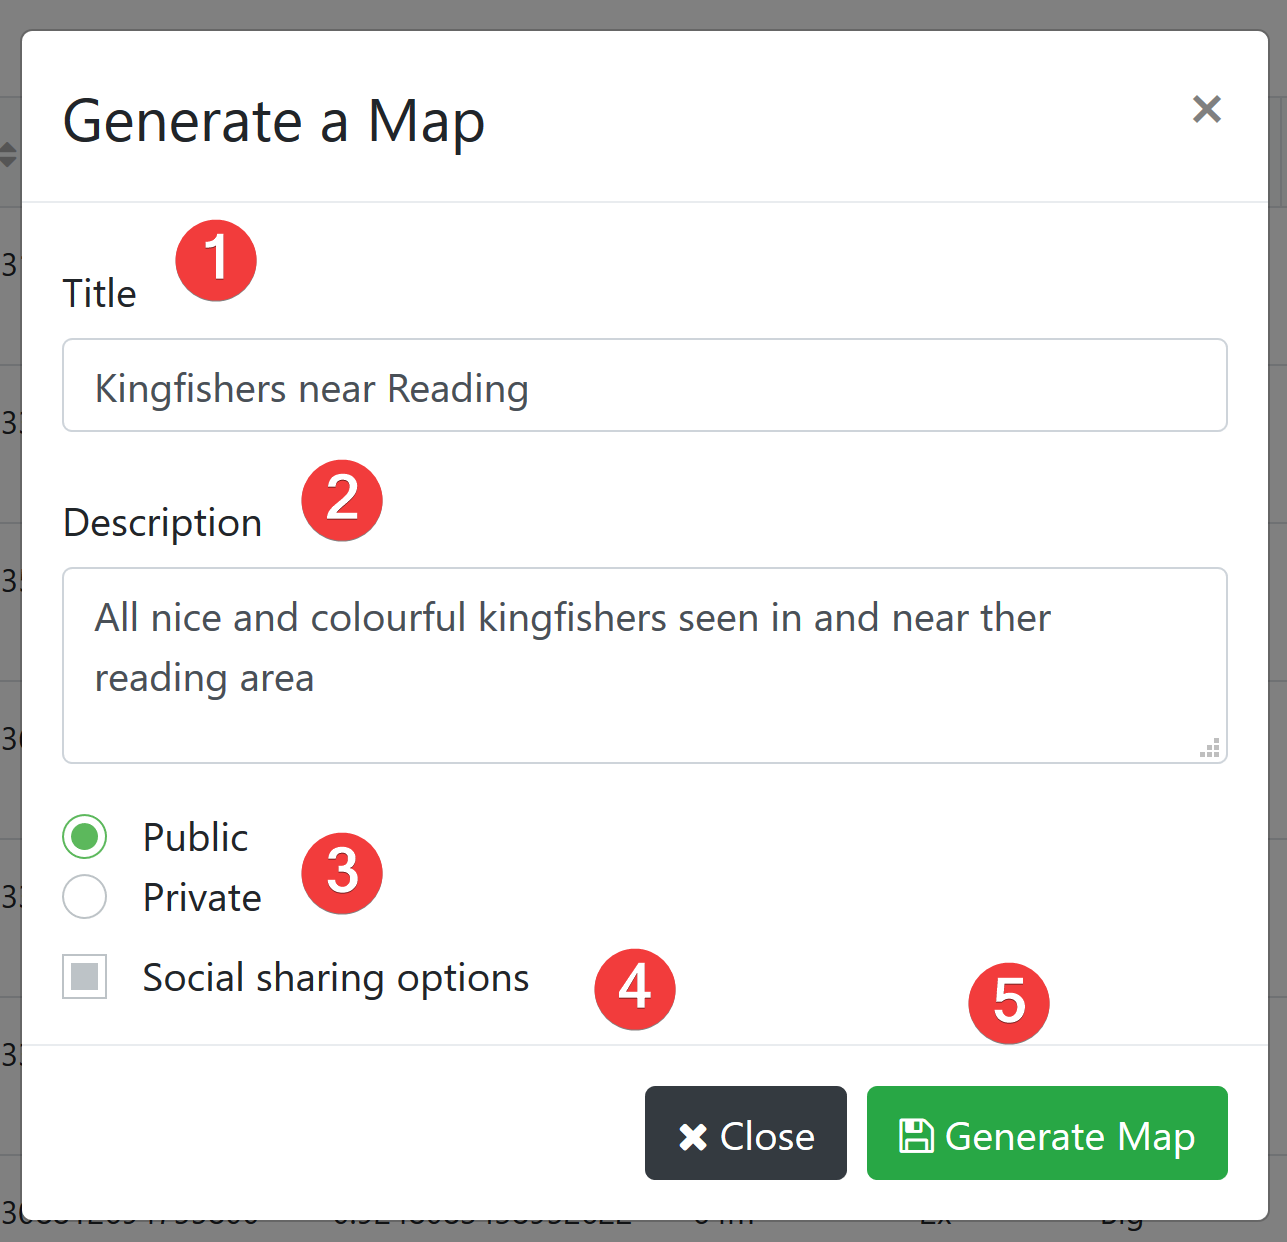
The "Generate a Map" popup shows up:

- "Title" field: Title of the map.
- "Description" field: Description of the map.
- "Public" or "Private" radio button: if public, it means that the link of the map can be shared with anyone. If private, visitors will need a password to see the map.
- "Social sharing options" checkbox: If checked, social buttons will be present with the map so that visitors can share this map with their contacts.
- "Generate Map" button: you need to click on this map to generate the map.
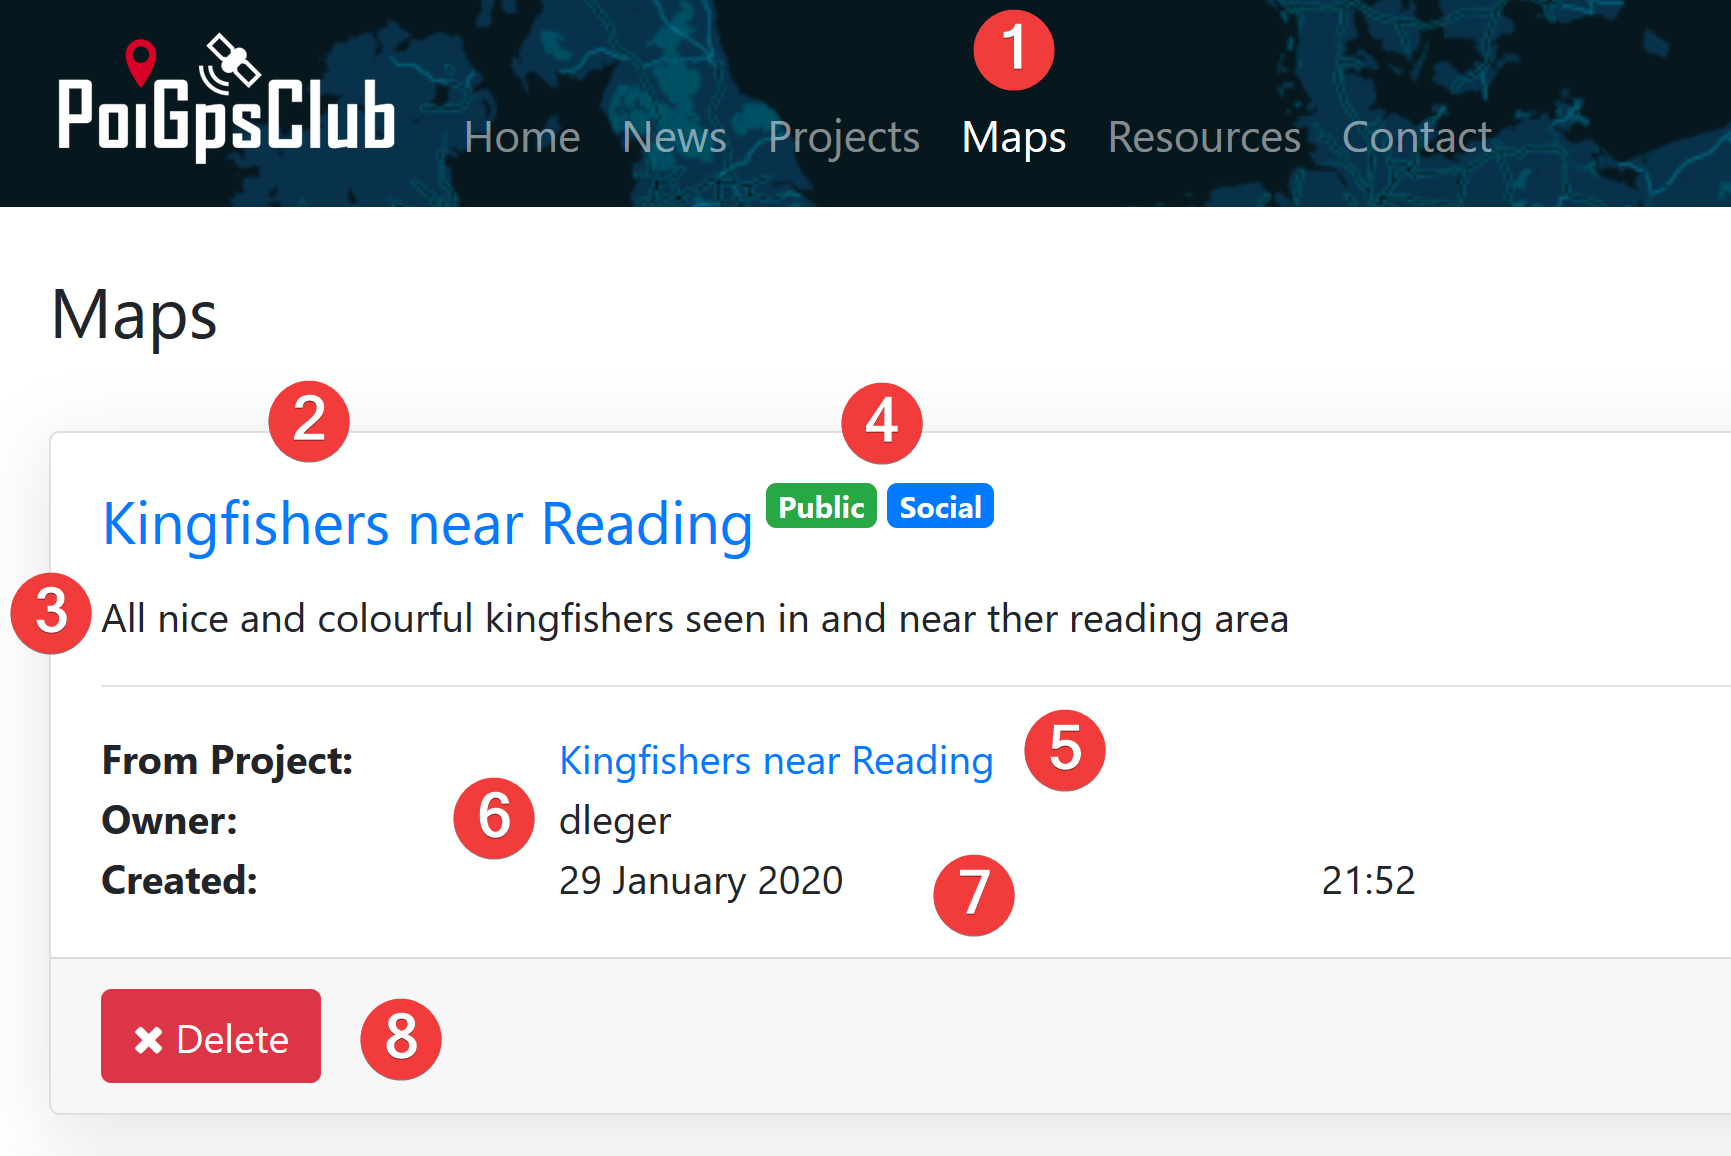
After clicking on the "Generate Map" button, you should see your map newly listed.

- Your "Maps" section of PoiGpsClub. Here are listed all maps you've created and/or the maps you've contributed.
- Map "title".
- Map "Description".
- Map "Public/Private" and "Social" status.
- Project name from where this map has been generated.
- Project/Map "Owner".
- Map generation date and time.
- "Delete" button. Only the map owner can delete his map.
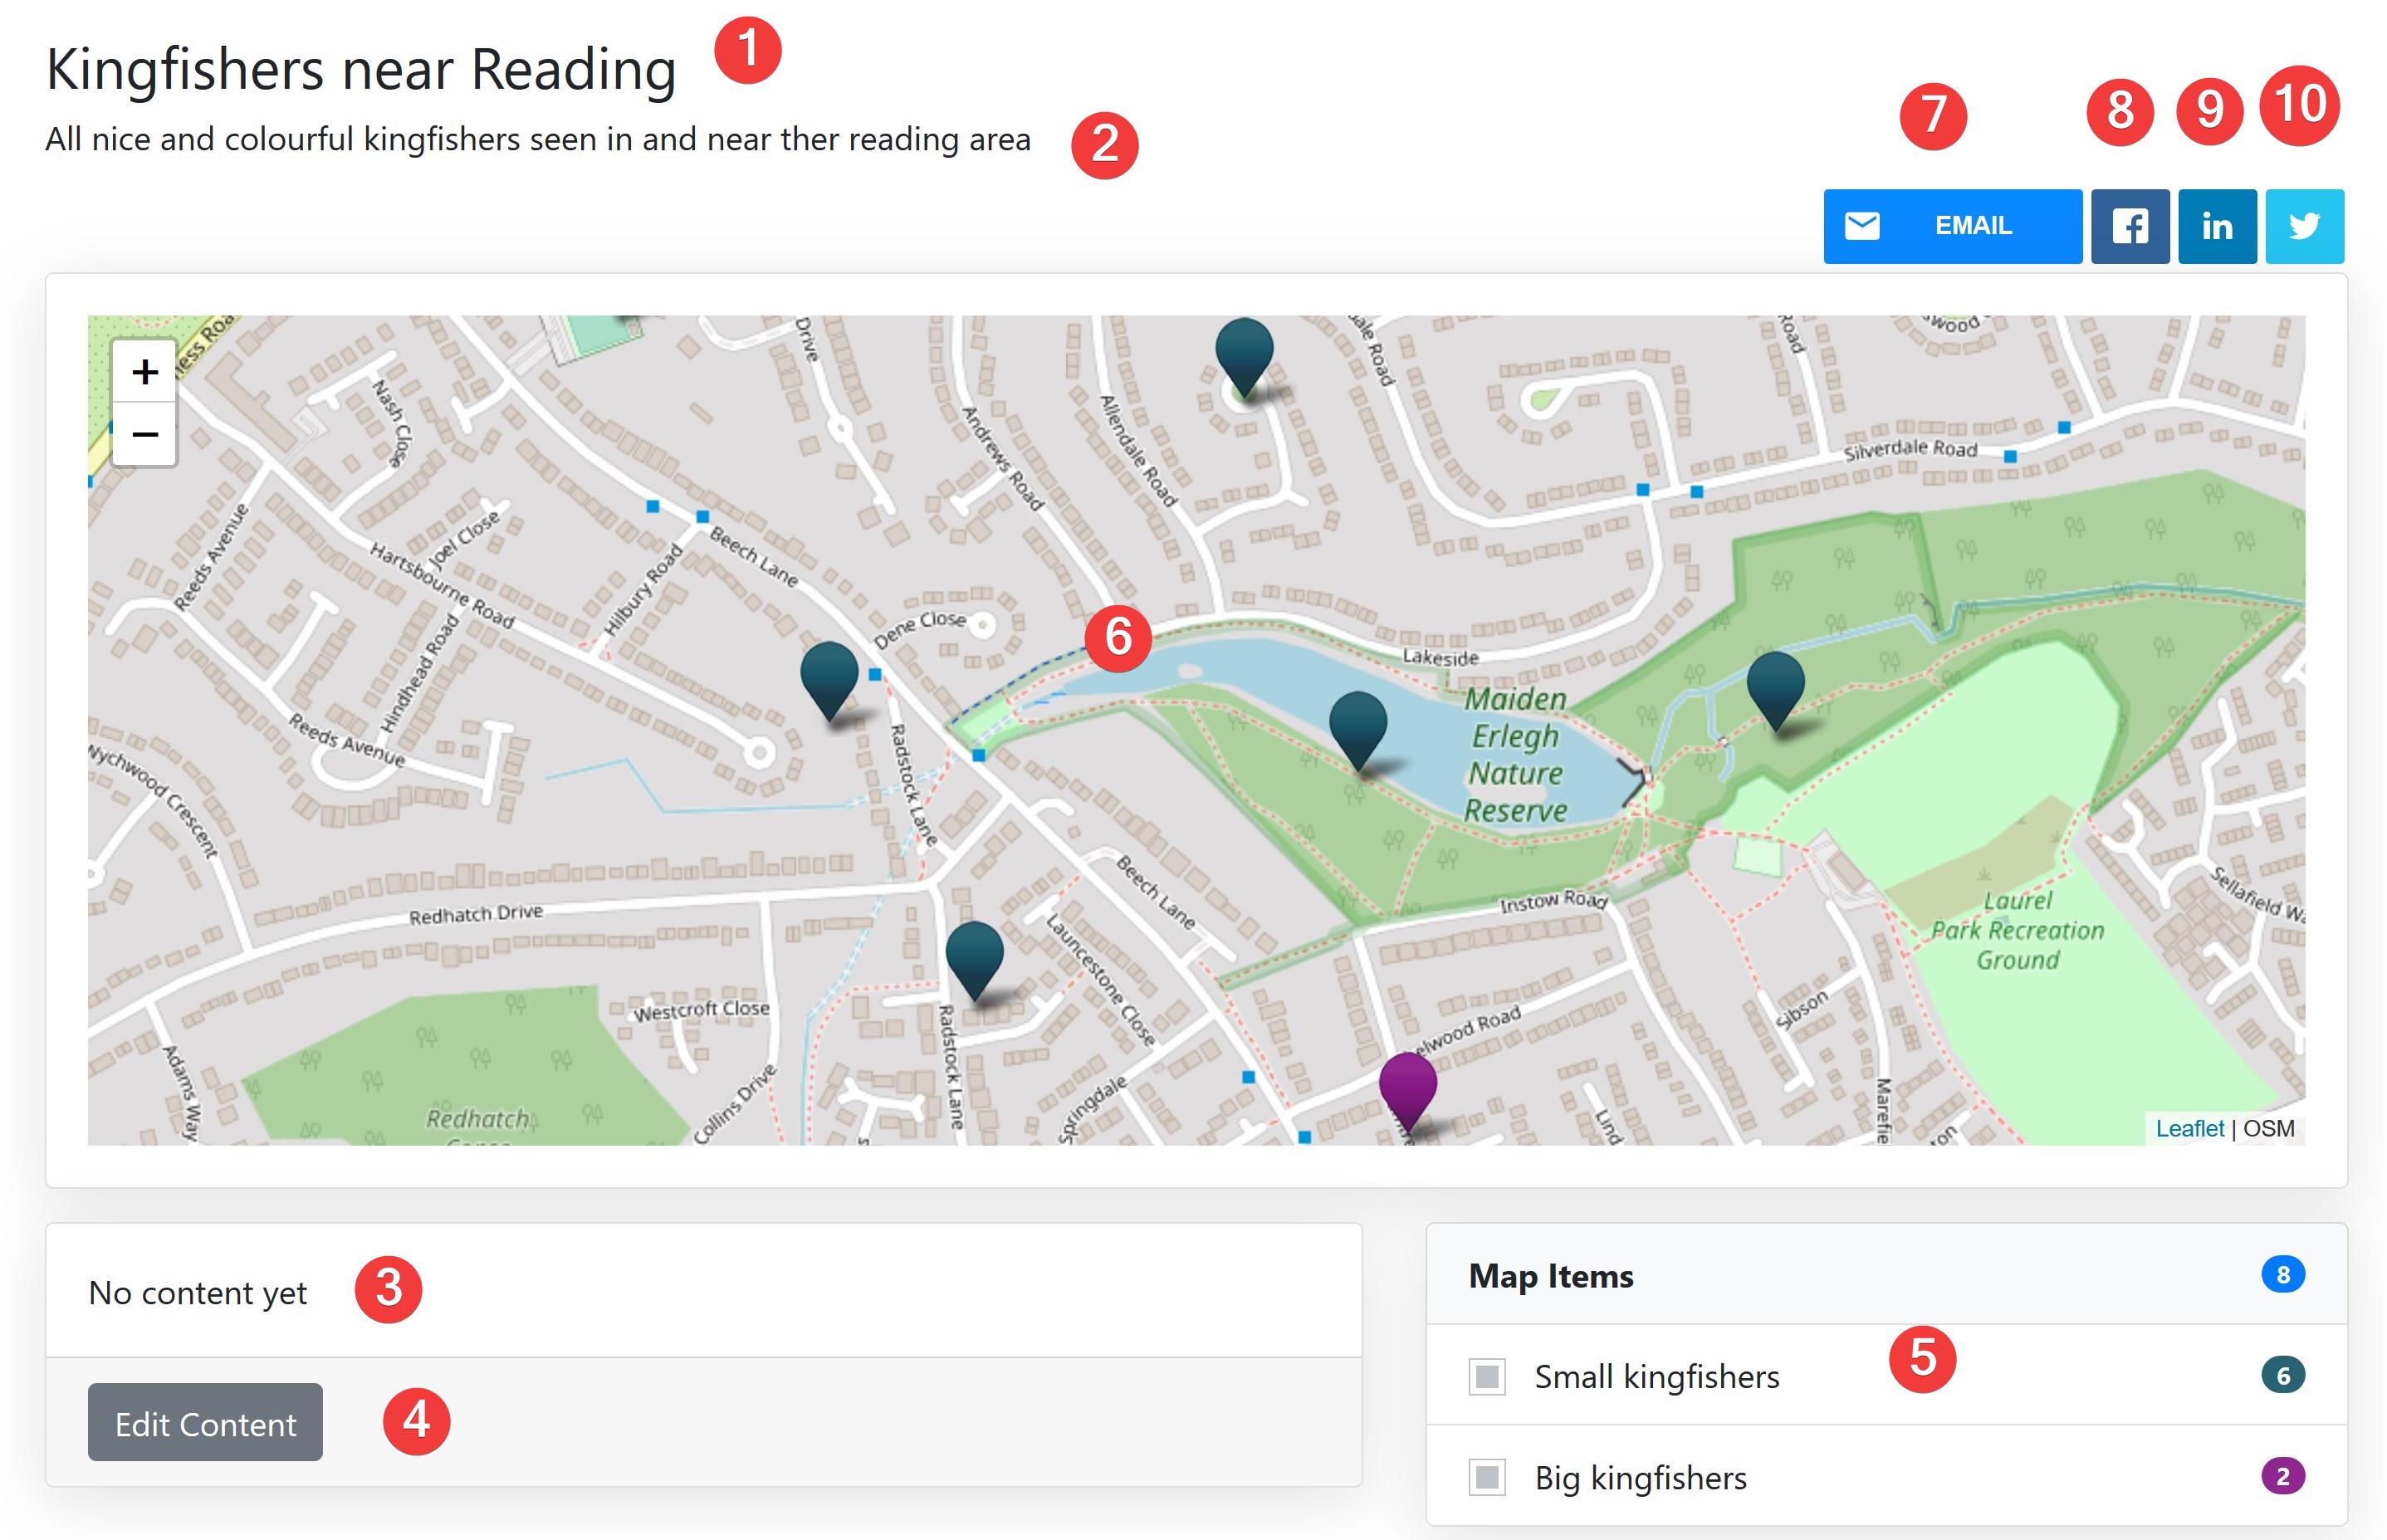
To view the map, please click on the map title.

- Map title.
- Map description.
- Map article. Here you can enter into details about what this map is about.
- "Edit Content" button.
- Map side panel. If you tick or untick checkboxes, you can show or hide items. If you click on the items counters it will recentrer the map on corresponding items.
- The map itself.
- Email sharing button.
- Facebook sharing button.
- LinkedIn sharing button.
- Twitter sharing button.
Denis Leger - 31/01/2020 18:55


