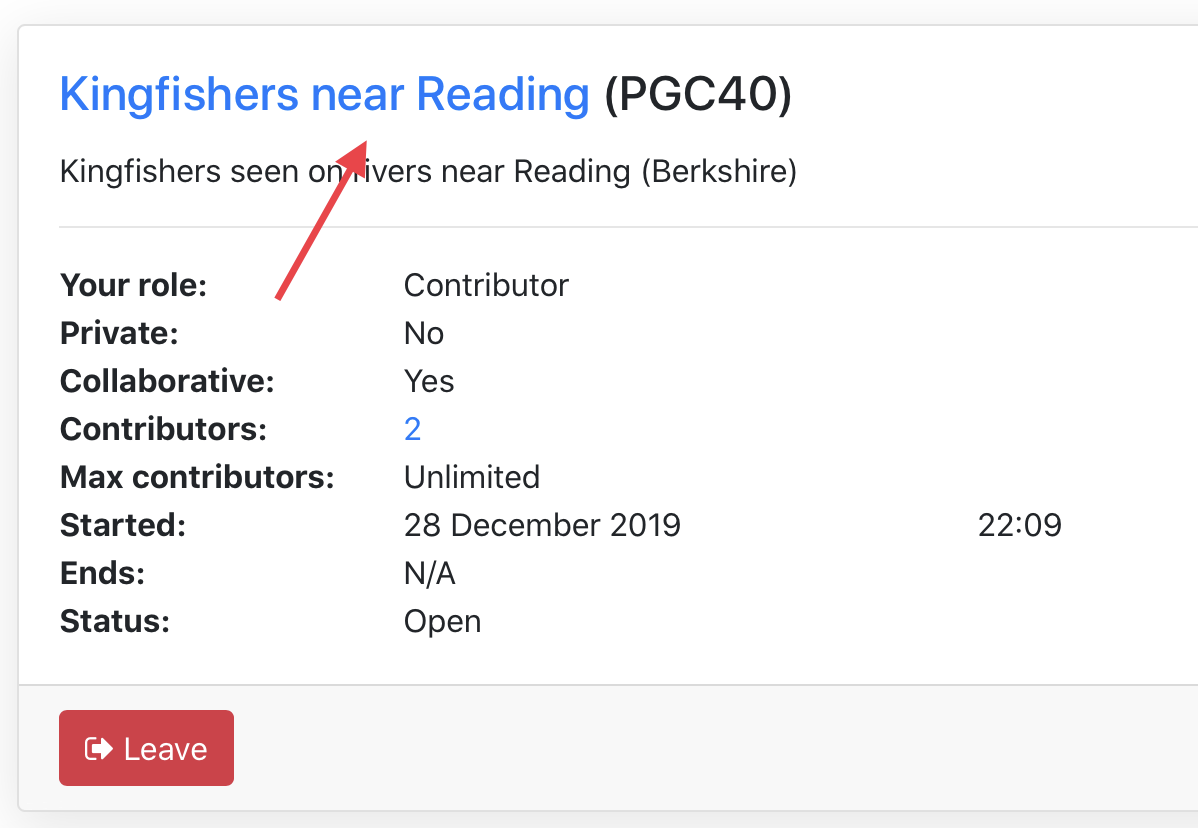
First, you need to go to the projects page:

From there, please click on the project name:

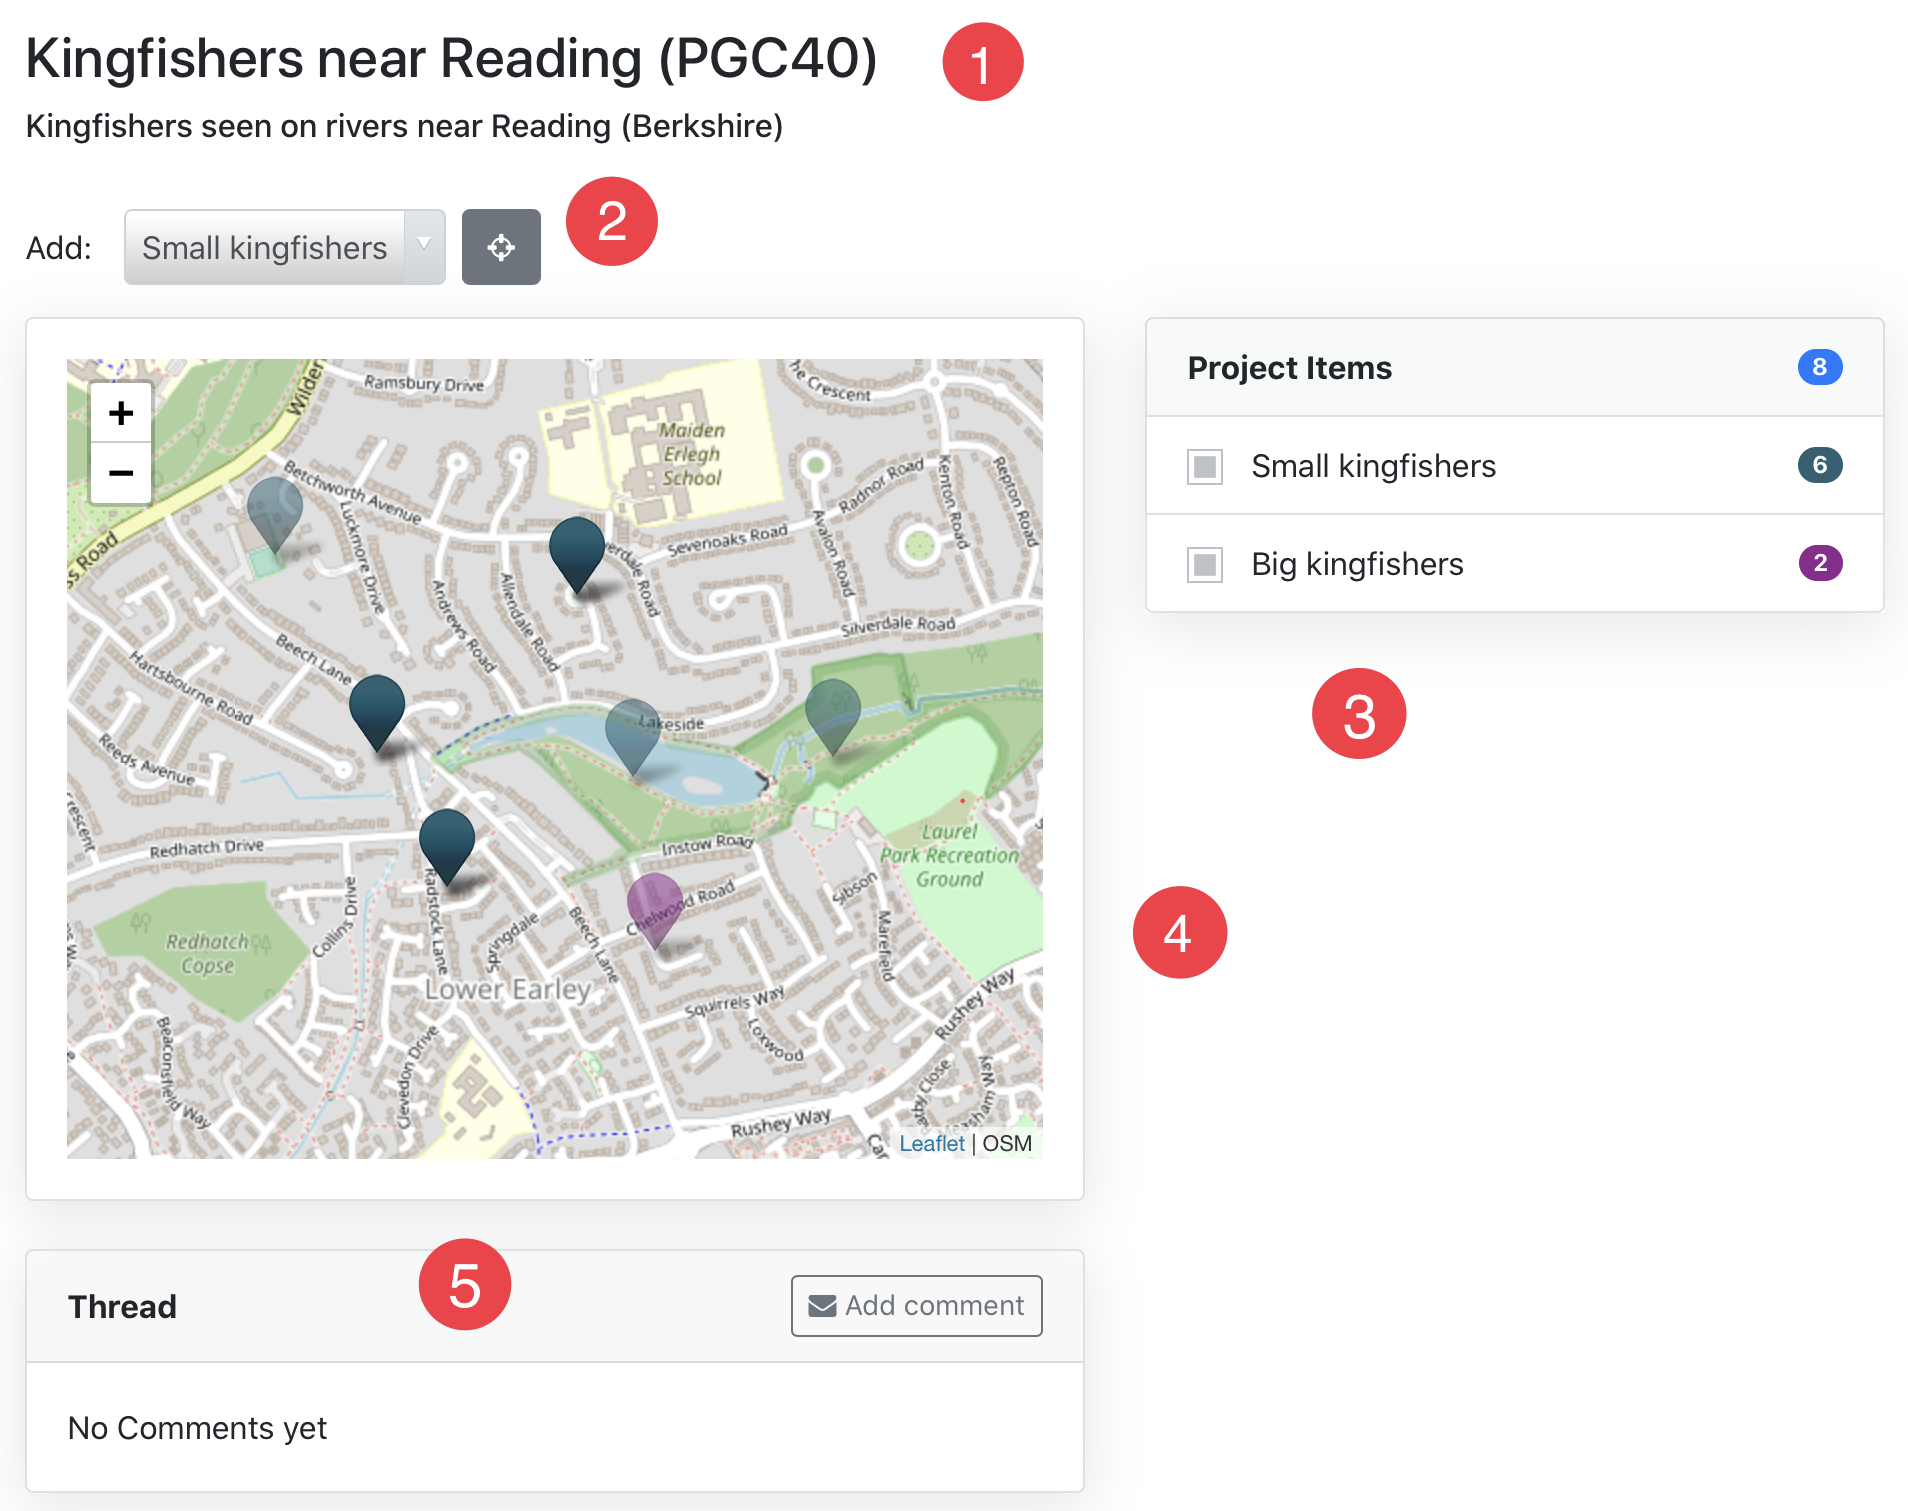
You can see the project map.

- Project Name, PGC Number and below, project description
- Selected Item to be added to the map followed by the “live map mode” button.
- When pressing on this button, the map will be centred to your current gps position.
- This “live map mode” is particularly useful when using a mobile phone.
- When using the “live map mode”, another “Add” button is present to add items on the map at your current position.
- Project Items followed by the total number of items present on the map, and below, the detail of those items.
- Ticking and unticking checkboxes will show or hide the corresponding items on the map.
- Clicking on the numbers right of the items will center the map on the corresponding items.
- The project map itself.
- You can zoom in/out the map using the mouse wheel on your desktop computer or doing pinch on your phone or tablet. Alternatively, you can click on the +/- signs on the map.
- Your items on the map are fully coloured when your collaborators items have a lighter opacity.
- You can put new items clicking anywhere on the map. If you are using the “live mode”, you can click on the “add” button.
- You can edit or delete items on the map, clicking on an existing item. If you are a contributor and if you do not own the project, you can only edit or delete items you have previously put on the map.
- Comments regarding the map and/or the project.
- You and the other contributors of the project can leave comments. Additionally, when a contributor leaves a comment, you can send him a private message clicking on the little envelope next to the contributor username.
To add new items on the map, please click anywhere on the map (except on places where you already have items).
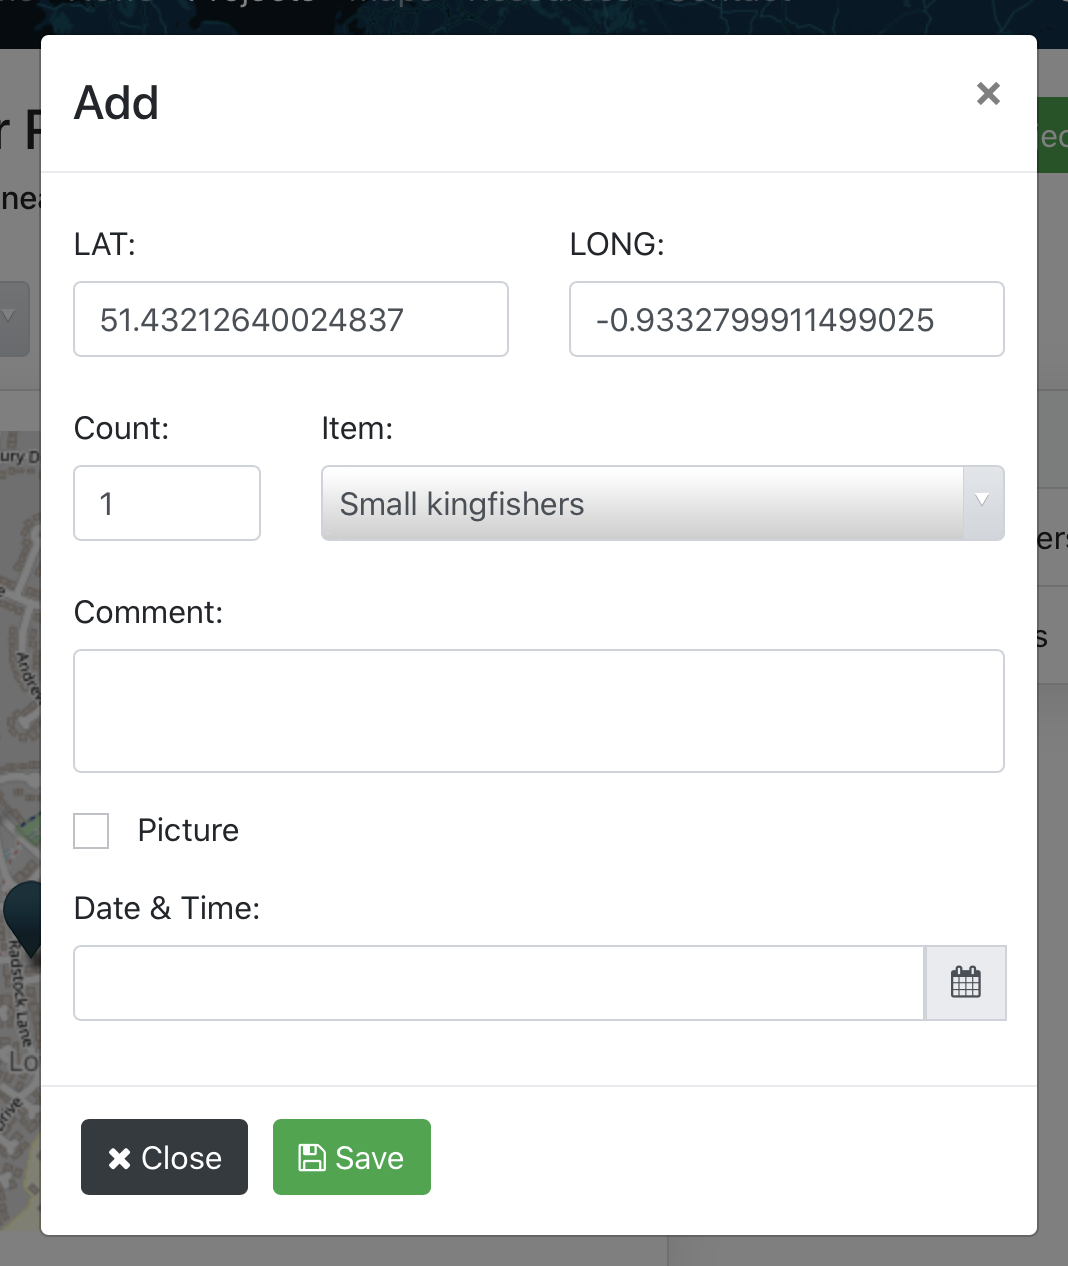
You should see this window:
- “LAT” (latitude) and “LONG” (longitude) fields contains the GPS position of where you clicked on the map. However, you can manually amend those values if needed.
- “Count” field: in this field, you can indicate how many items you want to put on the map.
- “Item” select: you can select which item you want to put on the map.
- “Comment” field: this is to add a comment specifically regarding the item you want to put on the map.
- “Picture” checkbox: if you tick this checkbox, you can add a picture to the item you want to put on this map.
- “Date & Time”: if you don’t use this field, it will automatically pick up the current date/time
Once happy with the form values, click on the "Save" button. You should now see your new item on the map.
Denis Leger - 21/01/2020 15:21


